Dr Ahmed Kharrufa, Senior Lecturer
School of Computing
Faculty of Science, Agriculture and Engineering
What did you do?
This case study is about an introduction to the human-computer interaction course, which has an equal focus on theory and hands-on group practical activities (e.g. prototyping and design).
The same topics, with slightly different emphasis and activities, are delivered to two cohorts, 185 students for 3rd year computer science students, and to 8 apprentices in the software engineering degree apprenticeship (new programme).
I used a flipped classroom approach in an online environment to make sure students get the most out of any activity through careful design of learning objectives. I also found quick and effective ways to respond to student feedback and included a variety of approaches to keep students engaged including videos, quizzes and group work using Microsoft Teams.
Who is involved?
- Dr Ahmed Kharrufa, Senior Lecturer, School of Computing
- 3rd year students, undergraduate course: 185 Students and 6 demonstrators
- MSc apprenticeship course: 8 apprentices and 1 demonstrator
Why did you do it?
In switching to online teaching and following the flexible learning framework where material needs to be available online and asynchronously, I needed to radically rethink how a module that combines theory and group level practical activities (e.g. design & prototyping) like mine should be delivered.
From my research experience in educational technology, the approach that I thought to be most appropriate is the flipped classroom approach. What is normally delivered as a lecture in a group space, will be delivered as online videos to be watched in students individual spaces; the individual reflective learning that used to happen after the lecture, will be moved to the online group space – that is, flipping the time and space of when/where things happen.
How did you do it?
Despite knowing a lot about the theoretical concepts behind the flipped classroom approach due to my research background, I still had a number of questions on how to put this approach into practice, especially in an online environment and for a module that also require hands-on group activities. Some of the questions below are specific to modules like mine, others are more general.
- How to run the group practical activities (e.g. prototyping, designing, group discussions) that are normally run face-to-face in lab sessions in an online flipped-classroom setting?
- If I am to put the lecture material online, how do I ensure (or at least increase the likelihood) that students study it before the live session?
- Most importantly, what should I actually do in the live session?
I will spare you the details of how I ended up with how I designed the module, but a lot of the inspiration on how to address the live sessions challenge was from Robert Talbert’s book ‘Flipped learning: A guide for higher education faculty’.
The key message adapted from the book is to use carefully-designed learning objectives to drive the whole design of the weekly cycle and as follows.
- For each week, make a list of all the learning objectives that the students are expected to achieve that week.
- Split these objectives into basic and advanced objectives
-
- Basic objectives are ones that correspond to lower-level thinking skills such as remembering and understanding. These are ones that students should be able to achieve by themselves using the provided material without support.
- Advanced objectives are ones the correspond to higher-level thinking skills such as applying, analysing, evaluating, and creating. These are ones that require support, feedback, and interactions with others.
Bloom’s taxonomy (Anderson & Bloom, 2001) can be a very helpful tool at this stage.
Now that the objectives have been defined and split into these two categories, make sure that students can achieve the basic objectives when working individually through the material provided to them such as the video lectures and reading material.
The next step is to design the practical activities and the live discussions to help achieve the advanced objectives. Objectives related to skills such as creating and applying (mainly procedural knowledge) are more suited to practical activities and objectives such as analysing and evaluating are more suited to activities in the live sessions.
An ideal weekly timeline can look like this
- At the beginning of the week (or better still on a Friday as most students later requested) release the videos, reading material and the brief for the practical activities. This also involves making very clear the basic and advanced objectives for the week. The students need to understand the difference between these so they know what is expected from them and how/when they will be achieved.
- Second half of the week, students submit their responses to the practical activities (details below).
- Then the teaching team looks at the submissions and give feedback to students (and feedback to the instructor before finalizing the live session).
- The live session to take place at the end of the week.
This timeline will give enough time for students to engage with the provided material, and to coordinate how to do any group activities before the live session. This also means that they will get feedback on their work before the live session and that the instructor will know what students have struggled with, and thus require revisiting at the live session.
The videos
The two key features that seem to have made the videos work well for the students are that they are short (10-15 minutes each, a week can have multiple videos, but each is short and focused on one main topic), and that they have embedded quizzes that test basic understanding of what has been covered.
Most of the students commented very positively on having quizzes in the videos to help them assess their learning and go back to things they did not fully understand (their feedback basically was the more the better). These are formative quizzes, so students do not feel pressure when answering them.

The activities
The activities include a mix of individual activities and group activities. To be able to give detailed feedback and scale up to large cohorts, the individual activities are designed to be the building blocks of group activities. If that does not apply, an alternative is to ask students give peer-feedback on their individual work.
The actual submission is usually a group activity. For example, students are asked to do individual design sketches, then as a group evaluate these sketches based on design rules, then submit one group design for feedback.
The live session
The general structure of the live session can be as follows
- A quick quiz at the beginning around basic understanding of the video/reading material. This serves two goals: 1) make students feel accountable and encourage them to come prepared, and 2) give a sense of the level of understanding of the students and see if some topics needs to be revisited briefly in the session.
- Give feedback on any feedback/reflection forms asked from the students at the end of the previous week’s live session.
- See if students have any questions on anything related to the week’s covered topics.
- Remind the students of the basic and advanced objectives and show them how each is being achieved.
- Discuss any points that emerged based on the students’ submissions to the practical activities (for the large cohort, I rely on the demonstrators input for this point).
- Give one or two activities that students need to work on in groups to help achieve one or two of the most important advanced objectives that have not been met yet. These normally relate to skills such as analysis and evaluation. One example activity for my module was for students in each group to split in two teams one arguing for and one arguing against user-centred design so they learn to take a more critical view of this approach. You can use breakout rooms, or pre-defined groups as MS Teams private channels for this (which is what I have used).
Private channels in Team
- Discuss students’ responses. For the large cohort, each demonstrator is responsible for a number of groups and the demonstrator will feedback back the most interesting points to the whole class. For the small cohorts, groups feedback directly to the class.
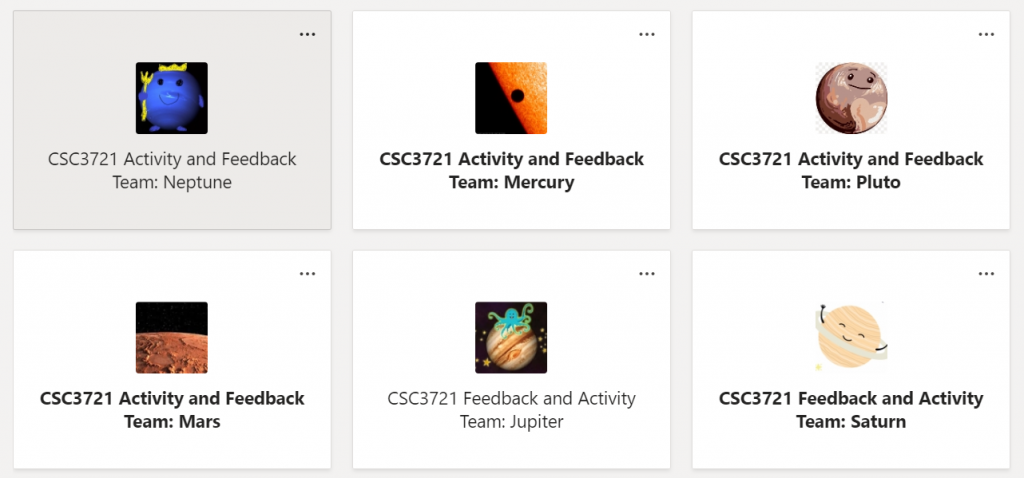
Using sub teams each assigned to a demonstrator to manage large cohorts
- Give students another opportunity to ask questions.
- Optionally ask students for some feedback (using a feedback form). This can be on what went well or what can be improved (which I did early on to respond to students feedback), or for them to reflect on their learning (what they have found most interesting/useful, or what have challenged their previous understanding). I normally show anonymised summaries of their responses at the beginning of the next session so students get a sense of the thinking of their cohorts.
Student Voice
“I think the format is brilliant and the way it has been delivered is great. I feel it gives flexibility and I can absorb the information in my own way. The quizzes during the videos are very helpful to gauge my learning”
”Materials on Canvas were very good and structured well. Practical activities were very useful and I was able to work through them, for the group components we are beginning to settle on a working model. The online session was very useful, I think in future sessions we will have more questions as we develop understanding.”
(apprentices – a cohort of 8)
“You really care about the module and it shows. I like how organised everything is and that you’re very clear in what the expectations for the week are and what is going on. It feels very organised”
“Having interactivity during the live sessions is very engaging and the quizzes are particularly useful in figuring out what I haven’t properly understood…Having a consistent structure is really appreciated, knowing what work needs to be done when is very helpful as it helps when creating my own schedule”
“Good blend of Q&A/Teaching with practical activities to allow us to get to know our teams and actually learn the content”
“Covering the content after the reading seems like it will be good because you can learn it at your own pace to begin with and understand things better due to the discussions in calls.”
(3rd year undergrads – a cohort of 185)
Does it work?
This approach seems to be working well as can be seen from the students’ feedback. Since I teach about user-centred design, I apply the same principle in teaching and try and make it student-centred designed module. I create a lot of opportunities for students to give feedback whether formal through forms or informal. A few of the students have noticed that the module follows the same user-centred approach to its design, and they have commented positively on this approach.
I have finished teaching the introduction to human computer interaction (HCI) part to the apprentices in 4 weeks. In a final reflection session and in discussing how to do part 2 of the module, they were very clear that they wanted to maintain the same structure and style of delivery as it worked really well for them with good balance between flexibility, structure, individual and group work. From the one-to-one discussion that the apprenticeship tutor had with 6 of the apprentices, the tutor reported that “they [apprentices] have consistently said they enjoy Canvas and have found HCI to be extremely interesting.”
As instructors, we always create objectives for our lessons. However, thinking of them as the central point to the design the whole week, breaking them down into basic and advanced objectives, then using this to decide on what will be in the videos/reading, what will be achieved through practical activities, and what gets discussed in the live session has been very useful for me. I believe that clearly explaining the why and how of the flipped classroom approach to the students early on, and clearly communicating the weekly objectives and how they will be achieved is one of the key reasons for the observed good level of engagement and the positive feedback so far.
Any useful resources?
- Talbert, R. (2017). Flipped learning: A guide for higher education faculty. Stylus Publishing, LLC.
- Anderson, L. W., & Bloom, B. S. (2001). A taxonomy for learning, teaching, and assessing: A revision of Bloom’s taxonomy of educational objectives. Longman
- Bloom’s Taxonomy
- Costa, K. (2020). 99 Tips for Creating Simple and Sustainable Educational Videos: A Guide for Online Teachers and Flipped Classes. Stylus Publishing, LLC. (not great, but a few useful practical tips to creating videos)
Graduate Framework
This approach develops the following attributes:
- Engaged
- Resilient
- Critical Thinkers
- Confident
- Creative, innovative and Enterprising
- Curious
- Collaborative
Staff can find out more about the Graduate Framework on the University intranet.